Saturday, July 25, 2009

Drains and Frames

I have installed another draining system on the trails. This was a different situation (no initial puddle/mosquito pit - just soggy trail.)


I dug a trench in the soggiest part of the trail. The water immediately began collecting in it, so I dug a slope so the water could run off the hillside. I then filled the trench with gravel (which was not an easy job, seeing as how the trench was in the woods in an area inaccessable with a wheelbarrow.) I covered the gravel with larger, flat rocks to (hopefully) prevent/slow buildup of leaves in the gravel.

I also went back and covered all the PVC pipe at the older drain site.

We had a few rainy afternoons this week, so I spent a fair amount of time completing smaller jobs indoors. One that I am specifically very proud of is organizing the paint area.

I didn't take a before picture, but I assure you that it was bad. I didn't even know we had drawers in the paint area (so I painted on labels.)

Dave, Ashley, Anna and I have been working all week on framing some windows for the Home Design/Build class. Because the structure is being built with rough-cut lumber, the pre-made frames that came with the windows weren't the right size. We had to adjust them. So we milled all the wood and built the frames for five windows (several different sizes.)

Then, the Home Design/Build class installed them.

The Home Design/Build class is over now; there was a nice celebration last night for the group. I still find it incredibly odd to have class switch-overs.

Yesterday was my last day of intern duties. My next two weeks should be a completely insane rush of Community Design/Build. I'm pretty excited about it. After that, there's an intern reuinion that I intend on staying for and then I'm heading home. I'm amazed at how fast time is going by here. It doesn't seem so long ago that the core class was here, and they were my first introduction to the school. Strange.

Monday, July 20, 2009

Invisible Structures

July 9-12, I took a course called Invisible Structures. It wasn't quite what I expected. The idea behind the course what that we would focus on a what a community needed to be sustainable other than highly efficient buildings. These need can be broken into spiritual, social, environmental and economic categories. I was a little frustrated during this course because of how much we designed to expand the social capacity. We focused more on intentional living facilities, or even non-intentional apartment buildings, than on towns or regions. I suppose this makes sense for a three day course, but I have to say, for my interests, this class was pretty unsatisfying. While there was definitely some great conversation and there were some interesting ideas and techniques that would improve an immediate community, it was just too small for my liking. Small scale and not focused on cutting carbon emissions enough. I am a student of Richard Olson, obviously. I have to remember (and I gave this note to my class) that my instructor and several of my classmates were from Canada in provinces that run primarily on hydroelectric power. They don't have to worry quite as much about cutting emissions.

Here are my notes from the class. Remember, you can click to make them bigger.


One thing that I starred to blog about was "the mythology of place." It's the attitude, or the declared vision. It's what the place is known for. For example, Berea's mythology (which doesn't imply that it isn't true) is of equality and progressiveness. Because of the history of the school and how they market themselves, this is what they are known for. It is possible that Berea is recognized as a sustainable school based greatly on this mythology of progressiveness. While Berea certainly is making some big efforts towards a more sustainable campus, they are nowhere near as perfect as a lot of people seem to think they are. The mythology, however, influences opinions and views of the school. A place will eventually gain a mythology - a mood or reputation - so it's a good thing to think of as a place is being developed. However, once a mythology is developed, it's hard to change, which is why coal mining communities are often so reluctant to try using a renewable source of energy - they have a mythology of pride in their work.

Wednesday, July 15, 2009

Drain and Home D/B

Days have been very busy around here.

I have been adopted by the Home Design/Build class as the assistant while the class is doing construction. They spend their mornings in the studio working on designs and receiving lecture, then the afternoon in the quansit hut building a small house that will later be taken to a client. There are two instructors, but many students with different skill levels, so they ask that I supervise and make sure nobody chops off any fingers. So far, I have done an excellent job.

The Home D/B project at the beginning of today (yesterday, there was no frame at all.)

The project at the end of the day. They were building their first wall in place. Today made me thankful for the weeks spent putting together a traditional stick-frame modeled house in my Ecological Design class freshman year. I knew what a cripple was.

There are a lot of people around campus this week. NBI, Home Design/Build and a masonry fireplace course. It's always a little strange to have a massive class shift. I generally get to know the majority of the people involved in week-long classes. (I do not always get to know weekenders - it's too short of a time period to try to remember names.)

I have been checking things off my list, although the process is going slowly since my afternoon has been taken away. My big project for today involved a puddle of mosquito-breeding stagnant water.

The stagnant water is, in this picture, below the trail. In actuality, it's uphill from the trail, causing the walkway to be mushy at times.

I dug a trench through the trail leading downhill (where there is plenty of drainage area.) When the mosquito-pit was mostly drained, I stuck a PVC pipe into it.

To keep critters from dwelling in my PVC pipe, I drilled some holes in the top. Water flows easily, but frogs do not. (During this process, I did relocate a frog to a new marshy area on campus. I haven't chased a frog in years.)

There are still some aesthetic issues that need to be taken care of (like the exposed PVC pipe) that I didn't get a chance to finish today. My goal, which I achieved by working through most of lunch, was to install the tube and make the path walkable again. I will poke around more tomorrow. (When I went back up to the site after helping the Home D/B class, I noticed that the puddle was still draining- coming out of the pipe, just as planned.)

I'm pretty happy with my progress this summer. I have learned quite a bit of technical information and skills, but I have also been learning a lot about working and living with others. I'm able to identify a need and take the initiative to solve the problem. I am someone who students go to when they need an answer. I am far more comfortable here than when I first arrived.

Friday, July 10, 2009

A Short, Concise Version of My Day.

Today, I made a small dent in my list of things to-do. I painted the holding portion of the composting toilet a dark brown (I couldn't find any black paint.) I climbed a tree to remove an old platform and line that was tied. I measured angles and sizes for a repair on a tent platform (but couldn't actually cut any wood because there was a class in the shop.) I cleared a new tent area, then moved my tent to it because there are plans to cut several trees around my campsite. I helped clean and set up studios for classes starting this weekend. It was a busy, wonderful, sun-shiny day.

This evening, I started my Invisible Structures course. So far, we have been talking about the definitions and markers of sustainable communities. More about that to come.

Thursday, July 9, 2009

Refreshed After Vacation

I took a week-long vacation to visit Boston for a cousin's wedding, family and friend visiting and general relaxing and escaping from the day-to-day. The time off was appreciated and wonderful, but I was very excited to get back to Yestermorrow.

And now I'm back. I've been back for a couple of very busy days.

There are two new interns - Anna and Ashley (male.) Tim (1) and Kendall are no longer interns. Kendall is gone and Tim is playing the role of resident builder. The new interns are nice - haven't gotten to know either extremely well, but am comfortable. The chickens grew quite a bit while I was gone. I almost couldn't tell which one was Betty Davis.

There is a push to get a building site (on campus) ready for a fabric-cement cabin. I don't know much detail about the actual structure - it will be built by several classes, I believe - but I have been helping a bit with getting the site prepared. Yestermorrow now has a giant brush pile that will be the source of an epic bonfire. We're also moving a building that a class constructed to it's site, which involves some tree-cutting. Perhaps I will write more about that this weekend.

I have been working closely with Dave, overseer of interns and grounds committee. This morning, we walked around campus identifying tasks that needed to be done. I am now in charge of making sure they get done, directing work-traders when available. The list is long and random. Today, I worked on getting some of those smaller tasks done.

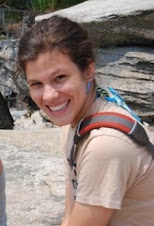
I look like an unhappy tree hugger in this picture. I am marking potential camp-sites. I have identified several tent-sites and one excellent platform site. I am hoping to head up the building of the platform.

The tree house needed massive cleaning. The pine needles were getting clogged in the cracks of the walkway, which can lead to rotting. While clearing them out with a pocketknife was a slow process, it was fairly easy and relaxing. I worked clearing the pine needles for a while, but then turned the assignment over to a work-trader so I could work on projects that required a little more skill or knowledge of the campus.

I thought I had gotten a before picture, but apparently, I did not. This ladder had a broken rung that needed replaced. Upon further inspection, I saw that the rung above the broken one had some rot issues happening. (These rungs are old - the tree is obviously growing around the rungs.) I spent the later part of my day repairing the two rungs using hardwood that had been cleared out of the concrete structure's site. The poplar rung (white) and the rung below it were my new additions. I'm actually extremely proud of myself for being able to do this without any guidance (other than what kind of wood to use.)

Anna, Ashley and I all went to visit the NBI project today. Last time I saw it, timbers had just been raised:

Today, it looks like this:

They started strawbaling today. It was a very exciting time.

In the picture above, Mike and Bryce re-tie bales. I apparently don't know the name of this mechanism, but it's very tight and precise. When I straw-baled for the studio that I worked on last summer, we used twine, tightening it by twisting it around a stick, then shoving the peg into the bale. Different approaches to the same problem.

The class notched out a corner of that bale and set it upright against a window frame. The notched corner fit the post.

Normally, bales are not placed vertically, but for lining the windows, it is appropriate.

The last two evenings for me have been lecture evenings. Yesterday was one of the Summer Lecture Series, which are free every Wednesday. Deva, the NBI instructor, spoke to us about natural building compared to green building. The room was packed.

Tonight, I sat in on the NBI's lecture on moisture content and heat flow in an earthen (primarily strawbale) structure. Took lots of notes (click to expand):


I am completely exhausted, but feel great. I've been running all day (I had breakfast duty this morning) but am very proud of what I'm doing. I've said it before, but I love being independent with projects - I love having the know-how to take on a project by myself. I feel confident with this list of things to do.

I start my Invisible Structures course tomorrow.

Saturday, June 27, 2009

Constructed Wetlands Notes

My constructed wetlands course was one of the best classes that I have ever taken. It was a pretty busy week, but we accomplished quite a bit. The instructors were very thorough - they, in specific detail, gave us directions on how to decide if a wetland is appropriate, how to size it, what levers and pipes to use, what water tests should be run, etc. They gave everyone a CD at the end of the course that had all their powerpoint presentations and charts and references that they used during the class.

I think I will let notes do the speaking for me, as far as specific information goes. If anyone has any questions, feel free to leave a comment. Please don't interpret my lack of writing specific details as not knowing them. This class was amazing and thorough and I feel like I understand all the topics we covered pretty thoroughly. (My weak spot would probably be in water testing, but I understand it, especially with the use of notes.)


(The bottom of this page was filled on a bus ride for a field trip. I wasn't doodling during class.)

(Notes from 10 Stones.)

(Notes from The University of Vermont Research Center.)

(Notes from Teal Farm.)


(Finding dimensions for our wetland.)
(Transit readings.)

(Watch for another entry about our field trip day.)

Thursday, June 25, 2009

Building the Wetland

My Constructed Wetlands class ended yesterday. The entire week whirred by. There will be multiple posts about it. I've been working on this post all week, adding on every day. I haven't been forgetting about you - just haven't come to a good stopping point. Until the class stopped, that is.

The class was officially titled "Constructed Wetlands for Waste water Treatment." So, we constructed a wetland for waste water treatment.

There's already a wetland from last year's class that treats the water from the solar shower. In the "master plan" for Yestermorrow's expansion (new buildings to accommodate more students and classes at one time,) there was a plan for a sink area near the solar shower. So, we decided to expand the water treatment capabilities by adding another wetland.

First, we had to survey the area. I was in charge of keeping track of the measurements. I fell in love with the transit completely. It was hard to get level.

Basically, one person would stand with a ruler-pole, holding it as straight as possible (and wiggling it some. The lowest number read is the right measurement.) The other person peeks through the transit, which zooms enough to read the numbers on the ruler.

After we surveyed our site, we finalized our plan for the placement of the wetland. We chose a place that was sunny, downhill slightly, nearby (just across the path), and not too close to the pine cabin.

For something so organic, the wetland required some precise measuring. We triangulated to make sure that our wetland was perfectly rectangular.

Then, we dug. The top of our wetland (not including the berm) measured 6 by 11 feet. There was a 1:1 slope, so the bottom of our wetland, which was 2 feet deep, was 1 by 6. We had to be careful not to cut out the slope too much, because it's much easier to carve the soil than replace it.)

We got our depth first. The wetland had to be level, and since the ground isn't, we had to make up for the differences. Therefore, our downhill side sticks out much more than the uphill side.

We connected our old wetland to the new wetland. (Also, you can see Barton holding a tape measure. This is because our ruler stick wasn't tall enough.)

We strung a line to help us keep the berm level and at the right height. You can see the slope of the wall shaping up in this picture.

The end of Day 1.

We wanted to divert the water that came off the pine cabin. Instead of letting it flow into the wetland (which would push the waste water through the wetland too fast) we dug a trench.

Kendall came and gave our class a tutorial on stop dams.

Kendall had built some stop dams the day before. The idea is that the dams slow down the water to keep it from eroding the path. We wanted to implement this idea in our trench.

So we built our own miniature dams. Theoretically, they will divert the water downhill and away from our wetland.

In the above picture, Pete, one of the instructors, is tamping the sides of the wetland. He got the sharp rocks out of the way, ready for the liner.

We put down a protective barrier.

Our waterproof liner was 10 by 15, a dimension that we had to keep in mind when digging our hole. Shoes weren't allowed on top of the liner.

We had to cut a couple holes in the liner for the inlet and outlet pipes. It was a fairly nerve-wracking process.

Our outlet pipe, perforated.

We set another protective barrier on top of the liner and started filling the wetland with gravel. We used large (3-6 inch) gravel at the top and bottom (to prevent any sediment build-up.)

We filled the rest of the wetland with 3/4 inch gravel. At the inlet, we placed a half pipe. This prevents rocks from getting too close to the inlet and clogging it. It also lets the water spread out freely. We installed our clean-out pipes (for pumping out any kind of sediment that might ever possibly build up at the entrance - the most likely place for sediment to clog.)

The top layer of gravel is pea gravel, to prevent organic materials from falling into and incorporating itself into the wetland. Here, Pete plants the first wetland plant. We picked plants from around campus, especially around water sources and the septic drain field. These plants have deep roots, and will grow until they are submerged in their water source. We'll keep the water level high for the first couple of weeks, then lower it (using a control in the sump pump) so that the plants stretch. A little later, we'll lower the level again so the roots get even deeper. Then, we raise the water level to operating height.

All the plants, with the finished rock wall. (And Barton, the other instructor.)

The sump pump was made of an old shop-vac with a grill lid for a cap. The shop vac was covered with the rock wall, but the grill lid was still visible, so we decided to paint an interpretive sign on it. This is the sketch for the sign, which explains the water process in the wetlands. (Shower, first wetland, second wetland, drain field.)

Many people worked on the lid. We would paint for a bit (with very limited colors) and then pick up the lid and rotate it, so we'd be working in a different spot that someone else started. It was an amazing artistic process. It was a lot of fun.

And the lid ended up looking pretty good. (This is a bad shot of it - you can't see any of the actual detail around the bottom. It looks great though, I promise.)

The Constructed Wetlands class and instructors, with our finished wetland.